Total Pageviews
Saturday, December 24, 2011
Sunday, December 4, 2011
Christmas Tree Card
This was my favorite card I made today. The tree was made with the Scallop Punch. You cut 5 scallops, 4, 3 and 2 scallops. Then glue them on top of each other. I used Snow Flocking for the snow and stickles on the Star Burst embosing folder. This was a lot of fun to create.
Christmas Cards
Here are some other cards I made with the Christmas Tree. I guess I was having a Chirstmas kind of day.
Christmas Tags
I used the Bigz Two Tag Die (Item #115954), Ornament Punch (119847). Stocking Punch (in the Holiday Catalog), Scallop Punch (119854), and the Prtite Pennants Builder Punch (122361) to make these gift tags.
Saturday, November 26, 2011
Wednesday, November 16, 2011
Bag in a Box
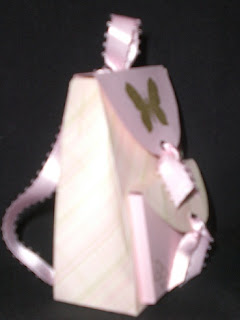
Today I made this cute Bag in a Box. I cased the idea from another Stampin Up Demonstrator, sorry I don't remember the site or the persons name. I used the Decorative Label punch for the top tab, DSP Holly Berry and stickers to emblish. This was a very simple project, actually I plan on making several to use for gift bags this Christmas. They are the perfect size for lotions and perfumes.
Thanks for looking and have a great day!
Terri
Thanks for looking and have a great day!
Terri
Check out my web site to order the DSP and punch. http://www.stampinup.net/esuite/home/craftsbyterri/
Sunday, October 23, 2011
Bat Moon
Sorry for the blurry picture - I'm having a little trouble with the camera. I used the 1 1/4" circle punch and the Bat Punch (retired - but you can still get it from the clearance rack) I drew the eyes and markes on the wings using a white gel pen. I am going to use these on the top of the cellophane bags for Halloween treats for the office.
Note Holder
Little Maggy looks so cute on this note holder. We made this at our last Card Clinic. I cased the idea from a friend at work. I'm so glad she shared this with me. Thanks for looking!
Thursday, September 29, 2011
Penguins
These cute penguins were made with the owl punch, the hat was made with the pennent punch and the snow is our new Mica Flakes. too cute.
Thursday, September 1, 2011
Thursday, August 18, 2011
Naughty & Nice Christmas Card
This week Mojo Monday challenge was fun and easy to create. I love seeing the different design they come up with.
I used the 1-3/4 Inch Scallop Circle Punch Item #119854.
Sunday, July 31, 2011
Dasher Christmas Card
I'm so excited to be able to start using my Dasher stamp. I purchased it after Christmas last year so I didn't get to use it. But I've already started getting ready for Christmas. Yeah!! I just love the holidays!
Birthday Pinwheel
This was a fun card to make. It's my first attempt at making a pinwheel. I used the new SU ribbon punch. This is such a beautiful punch.
Thanks for looking!!
Wednesday, July 6, 2011
Saturday, July 2, 2011
Birthday Pendents
Pennant Birthday Card - I used the new Pennant Parade Stamp Set, the Petite Pennants Builder Punch along with the Large Lace Ribbon Border Punch
Petite Pennants Builder Punch 12261 $16.95
Pennant Parade - Clear-Mount 122742 $16.95
Large Lace Ribbon Border Punch 122362 $19.95
Sunday, May 15, 2011
Tuesday, May 10, 2011
Monday, May 9, 2011
Saturday, May 7, 2011
Bug Invitation
Thursday, April 14, 2011
Sunday, April 10, 2011
Thursday, March 17, 2011
Happy Easter
I cased this project from Makeesha Byl
Easter Basket
by Makeesha Byl
Create a sweet little basket to hold Easter eggs or other small treats.
Supplies

- One 4 3/4" x 7 3/4" piece of cardstock for basket base
- One 1" x 11" piece of cardstock for basket handle
- One 1 1/2" x 15" piece of patterned paper to decorate basket base
- One 7/8" x 11" piece of patterned paper to decorate basket handle
- Scoring Tool
- Scissors
- Crop-a-dile
- Two large brads
- Adhesive
- Stamps, Ink and additional cardstock to decorate the basket
- Tissue Paper
- Easter Eggs
Step-by-Step
Step 1
Adhere the patterned paper strip on the center of your cardstock strip.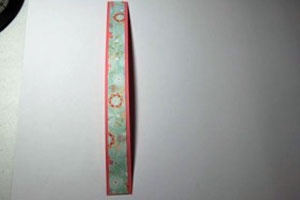
Step 2
Score your 4 3/4" x 7 3/4" piece of cardstock at 1 1/2" on each side.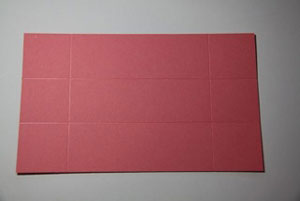
Step 3
Cut the cardstock at the two scored lines on either side of the long length of cardstock.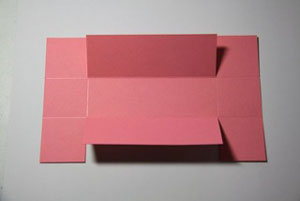
Step 4
Add adhesive to the outside four corners of cardstock.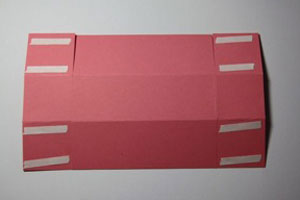
Step 5
Prefold your score lines, remove the adhesive backing and assemble your basket.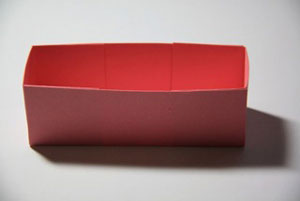
Step 6
Decorate the outside of your box.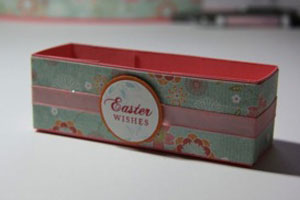
Step 7
Punch a large hole with your Crop-a-Dile and also an inch up from either end of your handle, making sure to line everything up.
Use a large brad to attach the handle to both ends of the basket.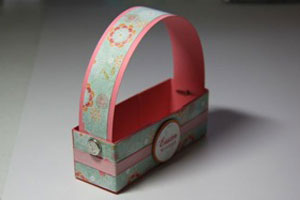
Step 8
Place tissue paper into the box base and then add Easter eggs.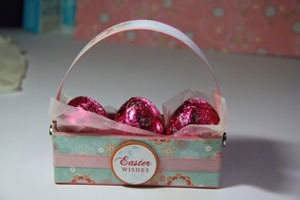
I
Subscribe to:
Comments (Atom)


 1-3/4 Inch Scallop Circle Punch


